Titanium Color "Printing" Using Electrochemical Anodization
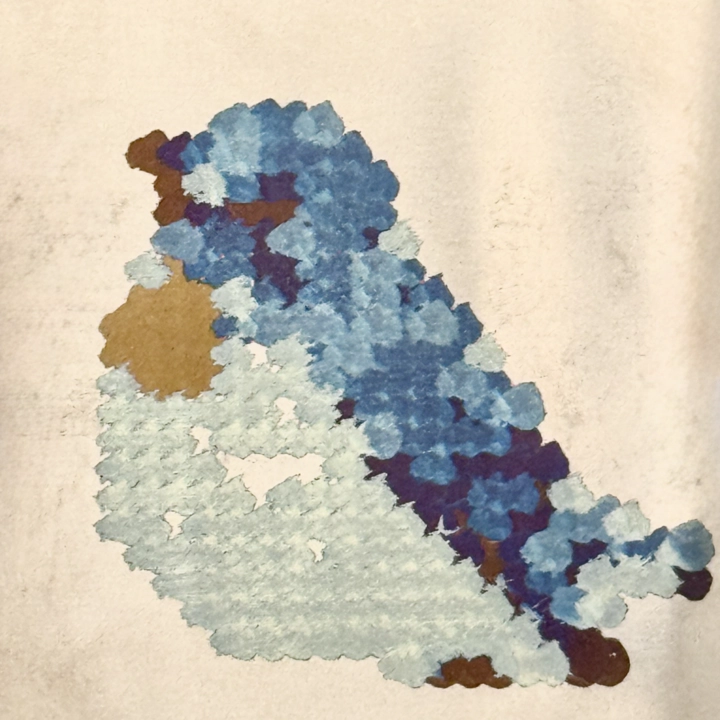
Table of Contents
Overview
This project is my Independent Undergraduate Honor Thesis, supervised by Prof. Emily Whiting. The goal of this project is to develop a pipeline that converts an user input image into GCode commands for a modified conventional 3D printer. The modified 3D printer is capable of electrochemically anodizing titanium to create color prints. The project is based on my previous group project on Titanium Color Printing using Laser during CS 581 Computational Fabrication course at Boston University.
Introduction
This project aims to create a pipeline for users to transform an image into an anodized-color titanium print. The pipeline will start with a user-provided image, quantize and map the colors to the palette titanium can produce, convert the image to GCode, and print it on a modified 3D printer.
Background
Traditionally, colored titanium is produced using flame, a technique that requires years of craftsmanship to master. Another method involves electrolysis, where the entire part is dipped in a conductive solution and exposed to high voltage. This process is dangerous and can only produce a uniform color. Achieving multiple colors requires masking areas with tape, applying one color, and repeating the process for additional colors. This project aims to provide a safe and accessible method for producing colored titanium prints.
Computational Approach
Image Processing
First, a semantic segmentation model (Cheng, Schwing, and Kirillov 2021) is used to allow the user to specify which parts of the image to extract. After masking the relevant areas, the image is cropped to a squre and scaled down to 32 by 32 pixels. To choose the colors of each pixel, the algorithm will choose the center pixel instead of the averaged color of the neighboring pixels. This way the image can retain more details, rather than blurring the image.
Color Quantization
Next, the colors of the image are quantized to 10 colors, making it easier to remap the colors to the titanium palette. The quantization is done using k-means clustering, which groups similar colors together and selects the centroid of each cluster as the representative color.
Re-mapping
Then, the quantized colors are mapped to the titanium color palette. The titanium color palette is a set of colors that can be produced by anodizing titanium. I tested voltage from 5V to 65V, and recorded which color each voltage produced.
For mapping, I first tried using the Euclidean distance in RGB and HSV color spaces, but I didn’t get very good result. The reason is those two color spaces are not designed for human perception. Instead, I used the CIEDE2000 color difference formula in the CIELAB color space, which is designed to be perceptually uniform. This means that the color difference calculated using this formula is more aligned with human perception of color differences. The algorithm will find the closest color in the titanium palette for each quantized color in the image, and remap it to the corresponding voltage.
The CIEDE2000 algorithm is quite computationally intensive, so by quantized the color beforehand, I can reduce the number of colors to compare, making the remapping process more efficient. The algorithm will iterate through each color in the quantized image, calculate the CIEDE2000 distance to each color in the titanium palette, and select the closest color.
GCode Generation
Finally, the remapped image is converted to GCode commands for the 3D printer. The algorithm will select voltage from low to high, each iteration it will write the corresponding x and y coordinates for the same color and voltage to the GCode file. This process is repeated for each color in the remapped image, creating a GCode file that can be used to control the 3D printer to produce the final print. Between each color/voltage, I added a pause command to allow me adjust the voltage on the power supply to the next color, and resume when I finished adjusting the voltage.
Fabrication Approach
3D Printer Modification
The 3D printer is modified to include an anodization tool head setup. I designed a custom pen holder to attach to the extruder, which holds my anodization tool. I then calibrated the tool to get the x, y, and z offsets correct.
Anodization Tool
The anodization tool consists of a titanium pen tip, a conductive solution, and a power supply. The pen has a cartridge that holds the conductive solution, and a soft brush that applies the solution to the titanium surface. I wrapped a wire around the pen tip to make it conductive. The conductive solution is over concentrated sodium bicarbonate (baking soda), which is safe to use and easy to obtain. It’s particularly safe with high voltage, because it will only produce sodium, hydrogen, oxygen, water and carbon dioxide, none of which are toxic. For the power supply, I used a 0-110V DC power supply. It cannot be controlled by the 3D printer, so I manually adjusted the voltage between each color change.
Experiment
Voltage Color Relationship
To determine the palette of colors that can be produced by anodizing titanium, I tested different voltages from 5V to 65V. I recorded the color produced by each voltage, and created a titanium color palette.
Anodization Time
I found the anodization time needs at least 5 seconds, otherwise the color will not be fully developed, and any longer than that won’t change the color anymore. So I can’t draw a continuous line, instead I will have to use more pixel art style, draw each pixel separately.
Printing Process
The printing process involves applying the conductive solution to the titanium surface, and then using the anodization tool to apply the voltage to the titanium. The 3D printer moves the anodization tool across the surface of the titanium, drawing each pixel on the correct x and y coordinate, creating the final print. The process is repeated for each color in the GCode file, with a pause between each color to allow for voltage adjustment.
I also set a re-rinse time of 2 minutes, meaning every 2 minutes or a new color, the printer will dip the soft brush into a cup with baking soda solution, making sure the brush stays moist and conductive.
Challenges
Computational
- Color Mapping Accuracy: It’s particularly challenging for white, grey, and black colors, because the hue value for these color are quite unstable, they can be any color with low saturation. To solve this, I used CIELAB color space to achieve a more stable color mapping, and making sure the mapped color is as close as the original color to the human eye as possible.
- Color Mapping Perception: Only using the color mapping algorithm might not produce the best results, even though the algorithm is designed to find the closest color in the titanium palette, one algorithm/color space might not always produce the most visually appealing result. To provide more control, the WebUI enables the user to choose which color space and algorithm to use, options including RGB, Hue + RGB, and CIEDE2000.
Fabrication
- Voltage Control: The power supply cannot be controlled by the 3D printer, so I have to manually adjust the voltage between each color change. This is a limitation of the current setup, and it would be great if I can get a programmable power supply in the future.
- Accuracy and Size Limit: The anodization head I can get is quite large, so each 10cm by 10cm titanium plate can only fabricate with 32 by 32 pixels. The printer can handle up to 0.1mm, so finding a smaller brush pen could solve this issue. My current solution is to use several plates and combine them together to create a larger print.
Conclusion
This project demonstrates a novel approach to creating colored titanium prints using a modified 3D printer and electrochemical anodization. By developing a pipeline that includes image processing, color quantization, remapping, and GCode generation, we can produce high-quality anodized-color titanium prints. The project is aimed at making this process more accessible and safer than traditional methods, allowing artists and makers to use easily available tools to safely create colored titanium prints.